Northumbrian Futhorc Rune Cards
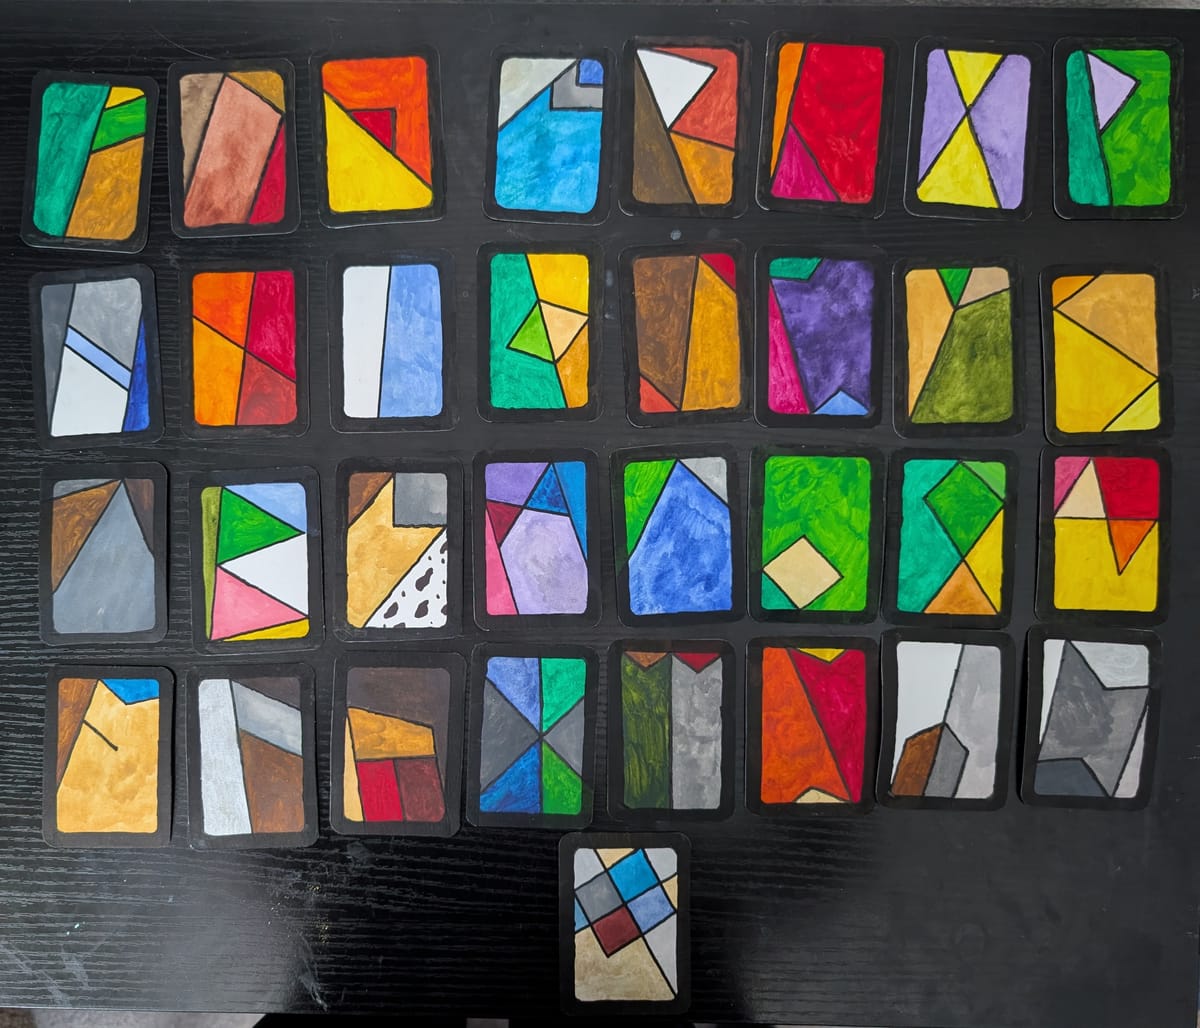
These took me a few weeks! They're ATC/poker sized and I used mostly Mungyo watercolors, with three metallic colors from Beam Paints.
Some of the colors were custom mixed and I didn't write down the recipes, but when I create the tutorial for these cards, I'm planning to advise choosing your own colors based on your own color symbolism. I might provide suggestions but I'm not keen on the idea of others exactly copying what I did.
I'm going to create an Elder Futhark set and probably an ogham set too; the tutorial will provide templates for all of them, with at least some suggestions of how to choose colors. If I do the ogham version, a friend who is better versed in Irish Paganism is going to provide suggested colors based on traditional sources.
If you want to make something similar with other symbols, such as a personal oracle, here's the basic process:
Ideally, get some non-reproducing graph paper with a grid - any number of squares per inch is fine as long as it works for you. Sketch 2.5" wide by 3.5" tall rectangles to represent your cards, with about a 0.25" border on the inside, then sketch your symbols and make sure you like the composition.
Next, get a 7x10" watercolor paper sheet for every 8 cards you want to make, and a pencil. Draw lines to divide the sheet in half along the 7" side (a line at 3.5") and in quarters along the 10" side (lines at 2.5", 5", and 7.5"). Add border lines inside each of the 8 resulting cells so that there is a 0.25" border around each side.
Copy your card designs; you can use a lightbox and trace if that helps. (All of mine were straight lines so I could reproduce most of them by measuring how far they started from the nearest corner.)
Paint your designs, including painting at least a little past the border lines. If you used watercolors, I suggest brushing them with a thin coat of soft matte gel medium because acrylics and acrylic markers don't like to be right on top of watercolor. (I learned this from Effy Wild, a mixed media teacher.) Use a soft, dry brush to brush away excess gel medium and let it dry again.
I used a PC-8K Posca marker for the borders and backs, and a PC-3M for the rune lines and to round the inner corners of the borders. You can cut them apart with either a paper guillotine or big scissors, depending on what you have and feel more confident with, then use a corner rounding punch. I used the 7mm setting on a punch with 3 different settings.
I haven't finished the backs of mine; you can mark up a template and then copy a back design you sketched, similar to the process for the fronts - you just wouldn't be able to use a lightbox on both sides. I created stencils the exact same size so that I could align it almost exactly the same on each card. More on that when I show the finished backs. I also plan to blacken the edges with a Posca; if you have experience hand gilding the edges of Tarot/oracle cards, you might want to do a different color.
Have fun and please show me what you make if you're comfortable doing so! You can tag alleywitch.cards on Bluesky or email me at alleywitch17@gmail.com